Long straight hair looks beautiful, but wearing it the same way every day can get boring fast. Maybe you always leave it open. Maybe you tie it in the same ponytail. Or maybe your hair looks flat no matter what you do.
If you are looking for 20 hair styles for long straight hair that are easy, pretty, and useful, this guide will help. You will find simple looks for school, work, dates, parties, weddings, and lazy days at home.
The best part is that most of these styles do not need salon skills. You only need basic tools like a brush, hair ties, bobby pins, claw clips, and a little styling product.
You will also learn how to prep your hair, make styles last longer, and avoid common mistakes that can make straight hair fall flat.
Before You Style: How to Prepare Long Straight Hair
Straight hair can be smooth and shiny, but that also makes it tricky to style. Clips can slide out. Braids can look thin. Buns can fall apart. That does not mean your hair is hard to style. It just means you need to prep it the right way.
Start with dry hair for most styles. Wet hair is weaker, so brushing or pulling it too hard can cause breakage. If your hair is damp, use a wide-tooth comb and be gentle.
If your hair feels too slippery, add grip. Dry shampoo or texturizing spray can help, especially at the roots. This makes braids, buns, and ponytails stay in place longer. It also helps long straight hair styles look fuller.
For sleek styles, use a small amount of lightweight serum. Put it on the ends, not the roots. Too much serum near the scalp can make your hair look oily.
If you use a straightener, curling wand, or blow dryer, apply heat protectant first. Heat can make hair dry over time, so use hot tools only when needed.
Choose soft accessories when possible. A silk scrunchie is gentler than a thin elastic. A claw clip can hold your hair without pulling too tightly. If a ponytail or bun hurts your scalp, it is too tight.
Good prep makes easy hairstyles for long straight hair look cleaner and last longer.
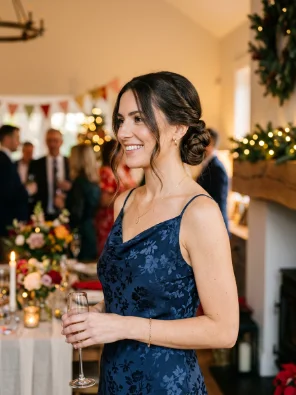
Twisted Low Bun
Best for: Dates, events, family gatherings
Time needed: 10 minutes
Difficulty: Medium
A twisted low bun is softer than a sleek bun. It gives straight hair more shape.
Part your hair in the middle or on the side. Take two front sections and twist them backward. Gather all your hair into a low bun. Pin the bun in place.
The twists add detail without making the style hard.
Pro tip: Loosen the twists slightly before pinning them. This makes the style look fuller.
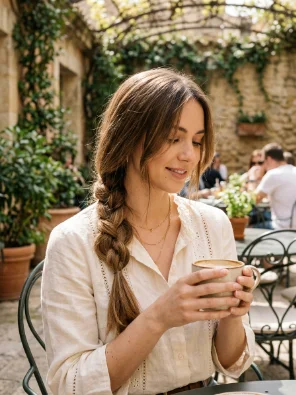
Tucked Behind-the-Ear Style
Best for: Work, simple outfits, jewelry-focused looks
Time needed: 2–3 minutes
Difficulty: Very easy
This style is simple, but it looks neat. It works best when your hair is smooth and your ends are brushed.
Part your hair in the middle or on the side. Tuck one or both sides behind your ears. Add a small clip if needed.
This is a good style when you want your earrings, makeup, or outfit neckline to stand out.
Pro tip: Use a tiny amount of serum on the ends for shine.
Straight Hair With Mini Braids
Best for: Casual days, beach looks, festivals
Time needed: 5–8 minutes
Difficulty: Easy
Mini braids add small details without taking much time. They work well when you want your hair open but less plain.
Take two small front sections and braid them. You can leave them hanging or pin them back. Add tiny clips if you want a fun look.
This is one of the cutest hairstyles for straight hair because it is simple but noticeable.
Pro tip: Keep the braids thin. Thick front braids can feel heavy.
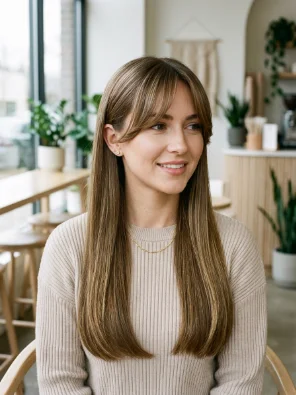
Straight Hair With Curtain Bangs
Best for: Everyday style, haircut refresh
Time needed: 5–10 minutes
Difficulty: Easy
Curtain bangs can make long straight hair look softer and more shaped. This is a haircut-based style, so it works best if you already have bangs or face-framing layers.
Use a round brush or straightener to curve the front pieces away from your face. Keep the rest of your hair straight.
This style adds movement without cutting your length.
Pro tip: Start with a small change if you are unsure about bangs. Long face-framing layers are easier to grow out.
Read – women over 50
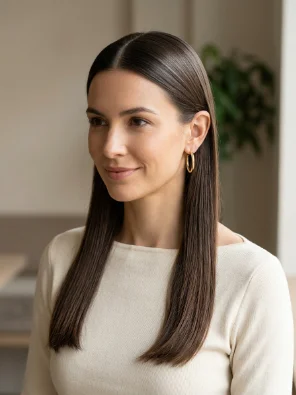
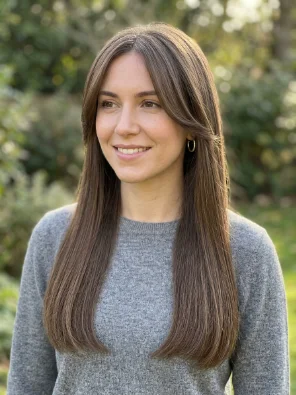
Sleek Middle-Part Hair

Best for: Work, school, dinner, photos
Time needed: 5 minutes
Difficulty: Easy
A sleek middle part is simple, but it looks clean and put together. It works well when your hair is freshly washed or straightened.
To create it, part your hair down the middle. Brush both sides smooth. Add a small amount of serum to the ends. Tuck one or both sides behind your ears if you want a cleaner look.
This style works because straight hair already has a smooth shape. You do not need to add much. Keep the roots light and the ends neat.
Pro tip: Use a tiny amount of styling cream on flyaways. Do not use too much, or your hair may look greasy.
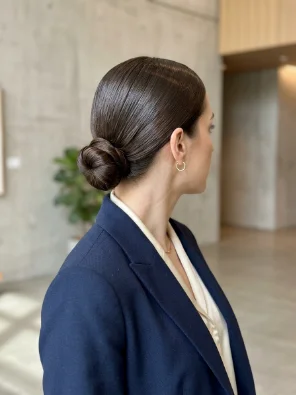
Sleek Low Bun
Best for: Work, weddings, formal dinners
Time needed: 8–10 minutes
Difficulty: Easy to medium
A sleek low bun is clean and elegant. It works well with a center part and smooth sides.
Part your hair. Brush it back into a low ponytail. Twist the ponytail into a bun and pin it in place. Use a small amount of gel or styling cream to smooth flyaways.
This style is great when you want a simple hairstyle that looks more formal.
Pro tip: Add pearl pins or a simple clip if you are wearing it to a wedding or event.
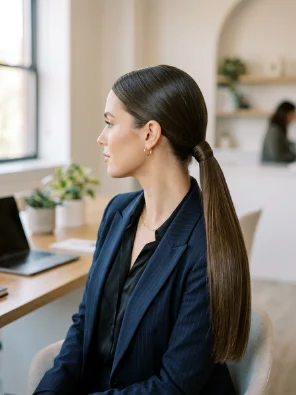
Low Sleek Ponytail
Best for: Office, interviews, formal outfits
Time needed: 5 minutes
Difficulty: Easy
A low sleek ponytail is one of the easiest ways to make straight hair look polished. It works with a center part or a side part.
Brush your hair smooth. Tie it at the nape of your neck. Use a little serum or styling cream to control flyaways. You can also wrap a strand of hair around the elastic for a cleaner finish.
This style is great when you want your hair to look neat without spending much time.
Pro tip: Keep the ponytail low and smooth. That is what makes it look elegant.
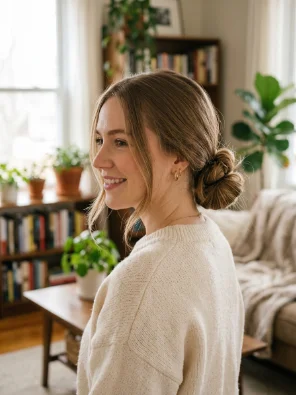
Low Messy Bun
Best for: Second-day hair, casual days, relaxed outfits
Time needed: 5 minutes
Difficulty: Easy
A low messy bun is perfect when you want your hair up but not too neat.
Gather your hair at the nape of your neck. Twist it into a loose bun. Secure it with a hair tie or pins. Pull out a few soft pieces near your face.
Straight hair may need extra grip for this style. Use dry shampoo or texturizing spray first.
Pro tip: Do not try to make it perfect. A messy bun looks better when it feels relaxed.
Loose Side Braid
Best for: Brunch, relaxed days, soft outfits
Time needed: 5–8 minutes
Difficulty: Easy
A loose side braid gives straight hair a softer feel. It is simple but looks more styled than a basic back braid.
Move your hair to one side. Make a loose three-strand braid. Secure the end with an elastic. Pull the braid gently to make it look fuller.
This style works well with face-framing pieces. You can leave a few strands out near the front.
Pro tip: Do not make the braid too tight. A loose braid looks fuller and more relaxed.
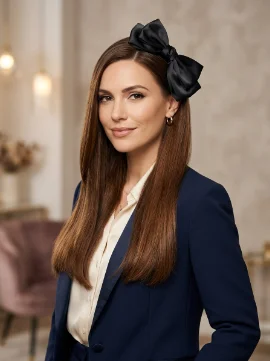
Long Straight Hair With Statement Accessories
Best for: Events, photos, quick styling
Time needed: 1–3 minutes
Difficulty: Very easy
Accessories are the fastest way to change long straight hair. You can use bows, pearl clips, barrettes, headbands, scarves, or simple metal clips.
This works well when you do not have time for a full hairstyle. Keep your hair open, add one strong accessory, and you are done.
Good options include:
- A black bow for a soft look
- Pearl clips for events
- A headband for school or work
- A scarf for casual outfits
- A metal barrette for a clean style
Pro tip: Pick one main accessory. Too many can make the style look busy.
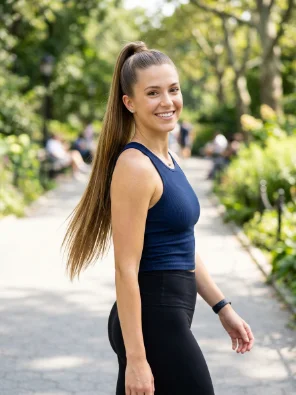
High Ponytail
Best for: Casual days, workouts, parties
Time needed: 5–7 minutes
Difficulty: Easy
A high ponytail gives long straight hair instant lift. It keeps your hair away from your face and makes the full length stand out.
Brush your hair upward and tie it near the crown of your head. Take a small piece of hair from the ponytail and wrap it around the hair tie. Pin it under the ponytail with a bobby pin.
This small step makes the ponytail look more finished.
Pro tip: Do not wear a very tight high ponytail every day. Give your scalp and hairline a break.
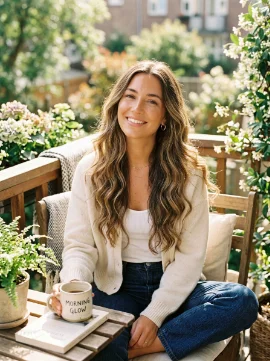
Heatless Overnight Waves
Best for: No-heat styling, soft volume, next-day plans
Time needed: 5 minutes at night
Difficulty: Easy
If you want to change your straight hair without heat, try overnight waves.
Use a soft heatless curler, robe tie, or loose braids before bed. In the morning, remove it and gently separate the waves with your fingers.
This gives straight hair more movement. It is also useful before doing half-up styles, buns, or ponytails.
Pro tip: Do not brush the waves too much. Use your fingers so the shape stays soft.
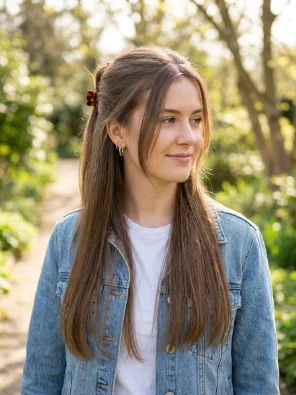
Half-Up Half-Down Hair
Best for: School, college, casual days
Time needed: 5 minutes
Difficulty: Easy
This style keeps hair away from your face but still shows the length. It is one of the best easy hairstyles for long straight hair.
Take the top section of your hair from both sides. Pull it back and secure it with a clip, elastic, or small scrunchie. Leave the rest of your hair open.
You can keep it simple or add a ribbon for a softer look.
Pro tip: Gently lift the top section before securing it. This adds volume at the crown.
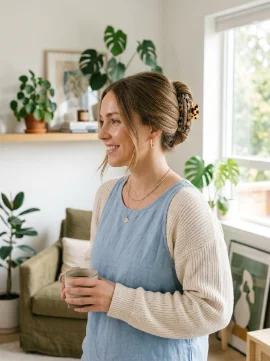
Half-Up Claw Clip Style

Best for: Busy mornings, casual outfits, second-day hair
Time needed: 2–3 minutes
Difficulty: Very easy
This is a fast style that still looks cute. Take the top half of your hair, twist it once, and secure it with a claw clip.
It works well for long straight hair because it adds shape without hiding the length. It also keeps your hair off your face.
Use a small or medium claw clip for fine hair. Use a larger clip if your hair is thick or heavy.
Pro tip: Pull a few front pieces loose if you want a softer look.
Face-Framing Front Pieces
Best for: Selfies, everyday looks, simple outfits
Time needed: 3–5 minutes
Difficulty: Easy
This is one of the fastest ways to change your look. Keep most of your hair simple, then style only the front pieces.
Part your hair. Take the front strands and shape them with a round brush or straightener. Curve them slightly away from your face.
This works well with open hair, ponytails, and buns.
Pro tip: Keep the bend soft. Too much curve can look stiff.
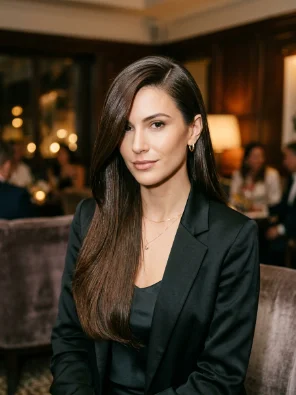
Deep Side Part
Best for: Evening looks, photos, simple outfits
Time needed: 2 minutes
Difficulty: Very easy
A deep side part can change your whole look without cutting or styling much.
Move your part farther to one side. Brush your hair smooth. Let one side fall naturally. Tuck the other side behind your ear if you want a cleaner finish.
This style adds volume on one side, which helps if your hair looks flat at the crown.
Pro tip: Use a little root spray or dry shampoo on the fuller side for extra lift.
Claw Clip French Twist
Best for: Hot days, work-from-home days, quick errands
Time needed: 2–4 minutes
Difficulty: Easy
A claw clip French twist is quick and practical. It keeps long hair off your neck without needing a tight bun.
Gather your hair like you are making a low ponytail. Twist it upward. Fold the ends down if your hair is very long. Secure it with a large claw clip.
This style is useful when you need your hair up fast.
Pro tip: Use a strong claw clip if your hair is thick or heavy.
Classic Three-Strand Braid

Best for: School, travel, errands
Time needed: 5 minutes
Difficulty: Easy
A classic braid is simple and useful. It keeps long hair controlled and prevents it from getting in your face.
Brush your hair first. Divide it into three equal sections. Cross the right section over the middle. Then cross the left section over the middle. Keep going until you reach the end. Tie it with a soft elastic.
Straight hair can make braids look neat, but it can also make them look thin. To fix that, gently pull the braid apart with your fingers.
Pro tip: Use dry shampoo before braiding if your hair is too smooth.
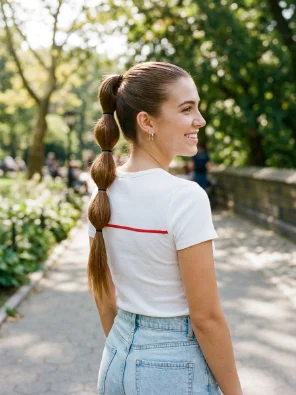
Bubble Ponytail
Best for: Parties, school, casual photos
Time needed: 8–10 minutes
Difficulty: Easy
A bubble ponytail looks fun, and it works very well on long straight hair. The length helps each bubble stand out.
Start with a high or low ponytail. Add small elastics every few inches down the ponytail. Gently pull each section outward to make it look round and full.
This style is great when you want something different but still easy.
Pro tip: Use clear elastics for a clean look, or colored elastics for a playful style.
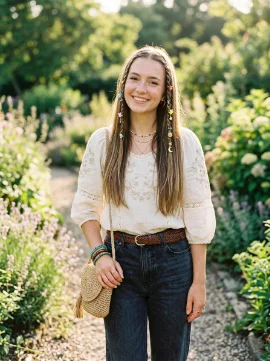
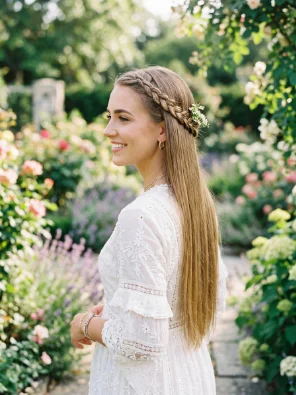
Braided Crown Accent
Best for: Festivals, photos, casual events
Time needed: 8–12 minutes
Difficulty: Medium
This style keeps your hair mostly open but adds detail at the front.
Take a small section from one side of your head and braid it. Do the same on the other side. Pull both braids back and pin them behind your head.
You can leave the rest of your hair straight. This makes the style easy, but it still looks special.
Pro tip: Add a little texture spray before braiding so the small braids do not slip.
Best Long Straight Hair Styles by Occasion
Not every hairstyle works for every plan. Some styles are better for school. Some are better for work. Some look nicer for weddings or parties.
Use this quick guide when you do not know what to choose.
| Occasion | Best Hairstyle | Why It Works |
| School | Half-up claw clip | Fast and comfortable |
| College | Bubble ponytail | Cute but easy |
| Work | Low sleek ponytail | Clean and professional |
| Interview | Sleek low bun | Neat and simple |
| Date | Loose side braid | Soft and relaxed |
| Wedding | Twisted low bun | Elegant but not too hard |
| Party | Bubble ponytail | Fun and eye-catching |
| Travel | Classic braid | Keeps hair controlled |
| Casual day | Low messy bun | Easy and relaxed |
| Photos | Sleek middle part | Clean and balanced |
For daily wear, choose styles that do not pull too much. Half-up hair, loose braids, claw clips, and low buns are good choices.
For formal settings, go cleaner. A low sleek ponytail, sleek bun, or tucked-behind-the-ear style usually works well.
For parties, choose styles with more detail. Try a bubble ponytail, mini braids, soft waves, or statement clips.
When in doubt, choose sleek styles for formal plans and softer styles for casual plans.
How to Make Straight Hairstyles Last Longer
Straight hair can slip out of clips, braids, and buns because it is naturally smooth. That is why your style may look good at first but fall apart after an hour.
The fix is simple: add grip before you style.
Start with dry hair. Add dry shampoo at the roots if your hair is oily or flat. Use texturizing spray through the middle lengths if you are making a braid or bun.
Do not use too much serum before styling. Serum makes hair smooth, but it can also make clips and pins slide out.
Use the right pin method. For buns, place bobby pins around the base instead of forcing one elastic to hold everything. For better hold, cross two pins in an X shape.
For ponytails, use two elastics if your hair is heavy. This gives more support. Just make sure the ponytail does not feel painful.
For braids, gently pull the sections apart after tying the end. This is called pancaking. It makes the braid look fuller and helps long straight hair styles look less flat.
Finish with light-hold hairspray if needed. Avoid heavy spray unless you need the style to stay for a long event.
The goal is hold, not stiffness. Your hair should still move naturally.
Conclusion
Long straight hair does not have to look the same every day. With the right prep and a few simple tools, you can create sleek ponytails, soft braids, easy buns, claw clip styles, heatless waves, and cute accessory looks.
Start with one or two styles that fit your daily routine. Then try more when you have extra time or a special plan.