15 Bridal Hair With Veil Ideas for Every Bride
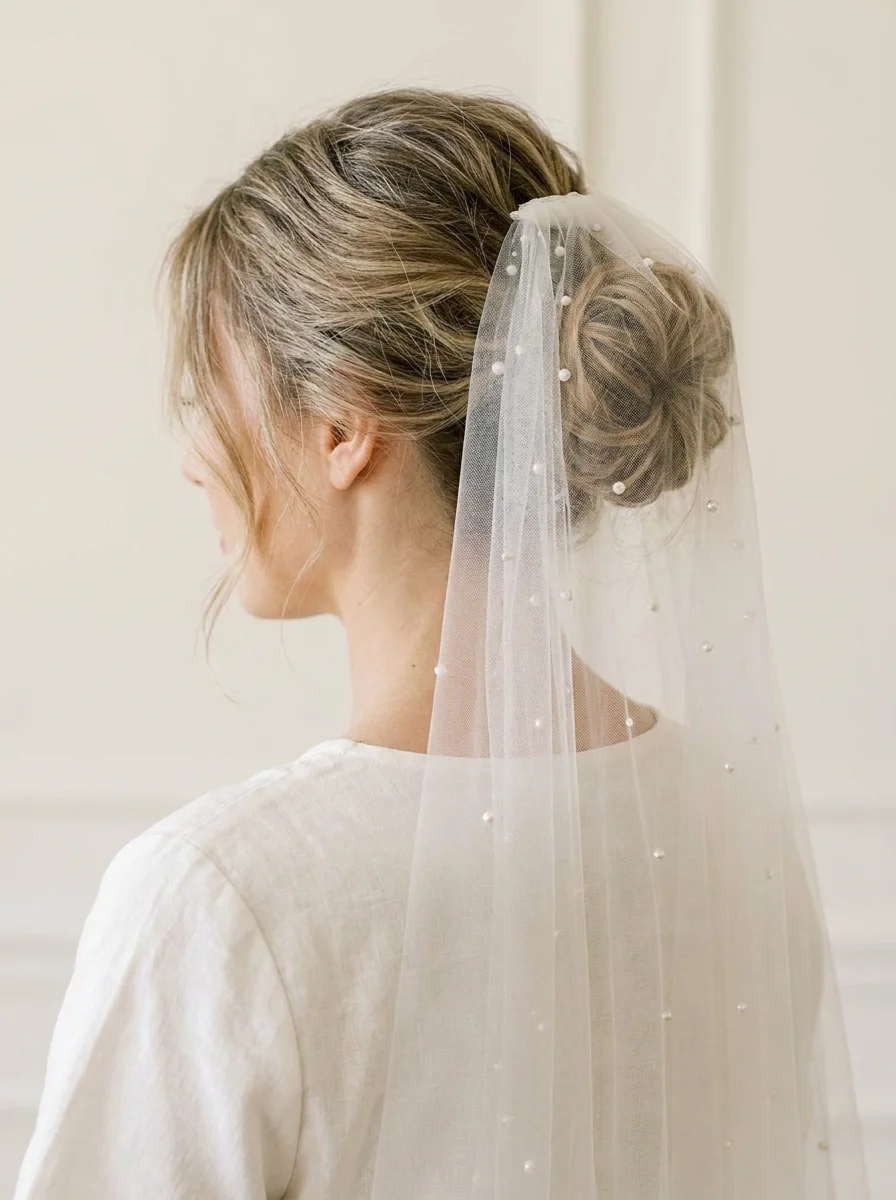
Messy Bun With Pearl Veil

Your veil can make your wedding hairstyle feel more romantic, more polished, or more like you. But choosing bridal hair with veil is not always easy. You may love soft curls, a low bun, or a sleek ponytail, but you also need to think about where the veil will sit. Will it hide your hairstyle? Will it slip during hugs, photos, or dancing? These are normal worries. The good news is that almost every hairstyle can work with a veil when it is planned well. A loose braid can hold a light veil. A low bun can support a long cathedral veil. Even short hair can look lovely with a birdcage veil or a small comb veil. How to Choose Bridal Hair With a Veil There is no single best hairstyle for every bride. The right look depends on your veil, dress, hair type, and how you want to feel on your wedding day. Start with your veil length. A birdcage veil is short and light. It works well with bobs, pixie cuts, finger waves, and side-swept styles. A fingertip veil gives you more movement and works with curls, ponytails, buns, and half-up styles. A chapel or cathedral veil is longer and needs a strong place to attach. Next, look at your dress. A low bun and veil can work well with an open-back gown because the veil can sit below the bun. This lets guests see more of the dress detail. A high bun may suit a dress with a high neckline because it keeps your neck and shoulders open. Your comfort matters too. Think about your weather, venue, and timeline. Loose curls can look soft and pretty, but they may need touch-ups in humid weather. A bridal updo with veil often stays in place longer, which can help if you have a long ceremony and a busy reception. Before you choose a final style, try it with your real veil. Your hair trial is the best time to test the look from every angle. Voluminous Ponytail With Veil A full ponytail can look bold, glamorous, and modern. It is a good choice if you have long hair or plan to use extensions. The veil can sit above the ponytail base. This keeps the style looking full while giving the comb a solid place to attach. Best for: Glam weddings, fitted gowns, and brides who want more height.Veil match: Fingertip or chapel veil.Stylist tip: Make sure the ponytail base is strong enough to handle the veil weight. Vintage Finger Waves With Veil Finger waves are smooth, sculpted waves that sit close to the head. They bring a classic Old Hollywood feel to your bridal look. This style works best with short to medium hair. Pair it with a birdcage veil or short tulle veil for a clean vintage finish. Best for: Vintage weddings, city elopements, and brides with short hair.Veil match: Birdcage veil.Stylist tip: Keep your earrings and necklace simple so the wave pattern stands out. Textured Low Bun With a Blusher Veil A textured low bun has soft pieces, gentle volume, and a relaxed finish. It works well with a blusher veil for brides who want a more traditional ceremony moment. The blusher can cover your face before the ceremony and then be folded back afterward. Your veil can sit right above the bun, giving it a secure base. Best for: Traditional ceremonies, romantic dresses, and soft floral wedding themes.Veil match: Blusher veil with fingertip or chapel length.Stylist tip: Keep face-framing pieces light so they do not fall into your eyes during photos. Soft Hollywood Waves With Fingertip Veil Soft Hollywood waves look polished without feeling too stiff. They are smooth, shiny, and full of movement. This style works well when you want a glam wedding look. You can wear the veil at the crown for a fuller shape or lower down for a softer finish. Pearl pins or a small side comb can add detail without taking attention away from the waves. Best for: Evening weddings, satin gowns, vintage themes, and formal venues.Veil match: Fingertip or chapel veil.Stylist tip: Ask your hairstylist to place the veil where it will not flatten the wave pattern. Sleek Low Ponytail With Veil A sleek low ponytail is simple, modern, and easy to wear. It looks especially good with clean satin gowns, square necklines, and simple jewelry. You can wrap a small piece of hair around the base to hide the elastic. The veil can sit just above the ponytail, giving you a neat shape from the back. Best for: Modern weddings, courthouse ceremonies, and minimal bridal looks.Veil match: Fingertip or chapel veil.Stylist tip: Use a veil comb with a strong base so it does not pull down the ponytail. Side-Swept Curls With Veil Side-swept curls are soft, romantic, and flattering. The hair sits over one shoulder, which makes this style a good match for one-shoulder dresses or gowns with a detailed neckline. The veil can sit at the crown or on the opposite side from the curls. A crystal comb or pearl clip can help bring the look together. Best for: Romantic weddings, one-shoulder gowns, and soft glam makeup.Veil match: Fingertip or chapel veil.Stylist tip: Keep the veil placement balanced so the style does not look too heavy on one side. Short Bob With Birdcage Veil Short hair can look amazing with a veil. A birdcage veil adds a vintage touch and works especially well with bobs, pixie cuts, and short waves. You can place it to one side with a comb, clip, or fascinator. If you prefer a fringe with your wedding hairstyle, explore these bridal hair with bangs ideas for another way to frame your face. This style feels stylish without being too formal. Best for: Courthouse weddings, city weddings, vintage themes, and short-haired brides.Veil match: Birdcage veil or short tulle veil.Stylist tip: Keep other accessories simple so the veil stays the main detail. Natural Curls With Veil You do not need to hide your natural curls … Read more

20 Bun Hairstyles for Every Hair Type and Occasion

Rose Bun

A good bun can save a bad hair day in minutes. It keeps your hair off your face, works in hot weather, and can look casual or dressed up based on how you style it. Still, many people repeat the same rushed messy bun every day. It is quick, but it can start to feel boring. You may want a bun that looks neat for work, soft for a dinner date, or fun for school. You may also need a style that works with thick hair, curls, or long hair. Choose Your Bun Fast You want… Try this bun A five-minute style Messy high bun A neat work look Sleek low bun More volume Bubble bun A party-ready style Braided bun A soft, romantic look Loose low bun How to Pick the Best Bun for Your Hair The best bun is one that feels good and fits your plans. You do not need perfect hair or expensive tools to make it work. Start with your hair length. Long hair gives you more wrapping room, so you can create fuller buns and braided styles. Shoulder-length hair can still look great in a low bun, claw clip bun, or half-up mini bun. If your hair is short, try a small top knot or use pins to hold loose pieces in place. Your hair texture matters too. Fine hair may need dry shampoo or texturizing spray for extra grip. Thick hair often needs stronger pins, two hair ties, or a larger claw clip. Curly hair already has natural volume, so soft buns can look full without much effort. Think about bun placement as well. A high bun feels playful and keeps hair off your neck. A low bun looks polished and works well with dresses, blazers, and work outfits. A side bun adds a softer look for dinners or events. You do not need to make every strand perfect. A few loose pieces around your face can make a simple bun look softer and more natural. Voluminous Low Bun Time: 8 minutesDifficulty: EasyBest for: Thick hair and formal outfits Pull your hair into a low ponytail. Divide it into two sections, twist each section, then wrap them around the base one at a time. Use strong U-shaped pins or spiral pins to keep the bun secure. Gently pull the bun outward to show off your natural volume. This is one of the best bun hairstyles for thick hair because it uses your hair’s fullness instead of trying to hide it. Keep textured buns loose enough to feel comfortable. If a bun feels painful, loosen it and use more pins instead of pulling harder. Twisted Side Bun Time: 8 minutesDifficulty: MediumBest for: Picture day, work events, and dinner plans Make a deep side part. Take a small front section from each side and twist it back. Gather the twists with the rest of your hair near one side of your neck. Tie everything into a low side ponytail. Twist the ponytail into a bun and pin it in place. Keep the bun soft instead of pulling it very tight. A pearl clip or simple barrette can make this style feel more dressed up. It is a nice choice when you want a bun that feels different from a regular low bun. Keep school and work buns comfortable. A style that looks good but gives you a headache is not worth it. Top Knot Bun Time: 5 minutesDifficulty: EasyBest for: Busy mornings and study days A top knot bun sits near the crown of your head. Pull your hair into a high ponytail. Twist it around the base, then spread the bun slightly with your fingers to make it look round and full. Do not pull your hairline too tight. A comfortable bun looks better and feels better. If your hair is fine, use a bun sponge or hair donut under the bun for more volume. This is one of the easiest work bun hairstyles when you need to get ready fast. Sleek Low Bun Time: 7 minutesDifficulty: EasyBest for: Work, interviews, and formal school events A sleek low bun gives you a clean and polished look. Start with a center part for a sharp finish. Apply a small amount of styling cream or gel near your roots. Brush your hair back into a low ponytail. Twist the ponytail around the base and pin it neatly. Hide the ends under the bun. Use a toothbrush with a tiny bit of gel to smooth small flyaways. This sleek bun hairstyle looks great with blazers, button-down shirts, simple earrings, and dresses. Side-Swept Low Bun Time: 10 minutesDifficulty: MediumBest for: Dinner dates and wedding guests Make a deep side part and sweep your hair back to one side. Gather it into a low ponytail behind one ear. Twist the ponytail into a bun and pin it close to your neck. Keep the front smooth, but let the bun stay a little loose. This style looks especially nice with one-shoulder dresses or outfits with a detailed neckline. Rose Bun Time: 12 minutesDifficulty: MediumBest for: Prom, engagement parties, and photos Start with a low ponytail. Divide it into two or three sections. Twist each section loosely, then wrap them around the base in a circular shape. Each twist should look a little like a flower petal. Pin the pieces as you go so they stay in place. The rose bun looks detailed, but it does not need perfect twisting. Small loose pieces can make it look even prettier. Pearl-Pinned Bridal Bun Time: 15 minutesDifficulty: MediumBest for: Weddings, nikah events, and bridal showers Start with a low bun or chignon. Keep the shape soft and full. Then add pearl pins around one side of the bun. Do not place too many pins in one spot. Spread them out so the pearls look light and balanced. You can also use small white flowers or a simple jeweled clip. This is one of the prettiest wedding bun hairstyles because it looks soft, … Read more

15 Hairstyles With Bandanas for Every Hair Type

Messy Bun With a Bandana Headband

A bandana can fix a basic hairstyle in just a few minutes. It can hide flat roots, keep hair out of your face, and add color to a simple outfit. But it is easy to buy a cute bandana and then have no idea what to do with it. Maybe it slips down your head. Maybe the knot feels too big. Or maybe you think bandanas only work with long hair. They do not. You can wear bandanas with short hair, curls, braids, ponytails, buns, and loose waves. The main trick is picking the right fold and tie for your hairstyle. These hairstyles with bandanas are easy to copy at home. Some work for busy mornings. Others are better for a beach day, a summer event, or a day when your hair needs a little help. Save your favorite look and try it with a bandana you already own. How to Choose a Bandana That Stays Put Before you pick a hairstyle, choose a bandana shape that works with the look you want. A standard square cotton bandana is great for casual styles. It works well with ponytails, messy buns, and loose hair. Cotton has a bit more grip, so it may stay in place better on straight or silky hair. Satin and silky bandanas give a softer finish. They can look lovely with curls, braids, and twists. They are also a nice choice when you want a dressier look. Keep in mind that smooth fabrics can slide more easily, so you may need a few hidden bobby pins. The way you fold the bandana matters too. Your Goal Best Bandana Style Keep hair off your face Folded headband Dress up a ponytail Bandana bow Cover roots or frizz Wide head wrap Add detail to a braid Woven bandana strip For a headband, fold the bandana into a long thin strip. For a vintage wrap, fold it into a triangle. And curls or braids, use a wider fold that covers more of the hairline. Start with dry hair when possible. A little dry shampoo at the roots can also help your bandana grip better. If the style still slides, place one bobby pin behind each ear under the fabric. Your bandana should feel secure, but it should never give you a headache. If it feels too tight, loosen it and try again. Bandana Crown Braid Create a crown braid around the top or back of your head. Once the braid is secure, wrap a thin bandana strip around part of the braid. Tie it at the back. This style takes more time, but it can look lovely for a summer party or outdoor event. A floral or soft pastel bandana works especially well with this hairstyle. Do not pull the braid too tight. The style should feel secure but comfortable. Best for: Events and dressier summer looksHair type: Medium to long hairUpkeep: Medium to high Braided bandana hairstyles look best when the fabric is folded thin. Thick fabric can make the braid feel heavy and hide the shape of your hair. Bandana-Woven Three-Strand Braid Start by folding your bandana into a narrow strip. Gather your hair into a low ponytail. Use the bandana as one of the three pieces in your braid. Braid your hair as usual, letting the fabric show between the sections. Tie the end with a small elastic, then use the bandana ends to make a knot or bow. This style looks best when the braid is not too tight. A loose braid lets more of the print show. Best for: Long hair and festival outfitsHair type: Medium to long hairUpkeep: Medium Bob Hairstyle With a Nape Tie Style your bob straight or with soft waves. Fold a bandana into a narrow strip, then tie it at the nape of your neck under your hair. This gives the hairstyle a simple retro feel. It also works well when you do not want the knot showing on top of your head. Try a printed bandana with sunglasses and a plain T-shirt for an easy weekend look. Best for: Short bobs and lob haircutsHair type: Straight or wavy hairUpkeep: Low Braids or Twists With a Satin Bandana Wrap A satin bandana wrap can look neat with braids or twists. Fold it into a triangle and place the wide edge near your hairline. Tie the ends at the back or top of your head. You can cover the full top of your hair or leave some braids visible at the front. This works well when you want a simple style for errands, travel, or relaxing at home. Choose a soft fabric and keep the wrap loose enough that it does not hurt. Best for: Braids, twists, and easy head-wrap looksHair type: Braided and textured hairUpkeep: Low Short hair and protective styles can look just as stylish with bandanas. Pick soft fabric, use a comfortable knot, and avoid very tight wraps around the hairline. Classic Bandana Headband With Loose Waves This is one of the easiest bandana hairstyles to try. Fold your bandana into a thin strip. Place it along your hairline and tie it under your hair at the nape of your neck. You can wear this look with natural waves, loose curls, or straight hair. It works especially well on days when your roots look flat or your front pieces will not stay in place. A middle part gives this style a soft, relaxed look. A side part makes it feel more vintage. Best for: Errands, school, and casual daysHair type: Straight, wavy, or loose curlsUpkeep: Low Curly Hair With a Wide Bandana Wrap A wide bandana wrap is a simple way to style curls when you want the front of your hair controlled but still want volume at the back. Fold the bandana into a wide strip. Place it near your hairline and tie it at the back or top of your head. Leave your curls full and loose behind it. This style can help when your … Read more